

You picked up a pumpkin. You’re staring at it. It’s staring back. And somewhere between “I should do something cool with this” and “I have zero artistic talent,” you ended up here.
Good news: pumpkin painting is the most forgiving craft project on the planet. Unlike carving — where one wrong cut means you’re starting over with a new gourd — paint lets you layer, fix mistakes, and go as simple or as intricate as you want. No knives. No scooping out seeds. No stress.
This guide covers everything: quick designs you can finish during a single episode of whatever you’re bingeing, ambitious projects for the overachievers, kid-friendly ideas that won’t destroy your kitchen, and the actual material knowledge you need so your painted pumpkin doesn’t look like a melted mess by October 31st.
We’ll walk through trending styles for fall 2026, the best paints and tools for different surfaces, preservation techniques, and designs organized by difficulty level and audience. Whether you’re decorating your porch, hosting a pumpkin painting party, or just want your desk pumpkin to look intentional — you’re covered.
Why Painted Pumpkins Have Taken Over (And Why Carving Is Losing Ground)
Painted pumpkins aren’t new, but they’ve become the dominant form of pumpkin decorating over the last several years — and for practical reasons, not just aesthetic ones.
Carved pumpkins rot fast. Once you cut into the skin, you’ve broken the pumpkin’s natural barrier. Depending on your climate, a carved jack-o’-lantern lasts 5–10 days before it collapses into a sad, moldy heap. A painted pumpkin — properly sealed — can last 2–3 months. Some people keep faux painted pumpkins for years.
Safety matters. The American Academy of Pediatrics has long recommended no-carve pumpkin activities for younger children. Paint, markers, and stickers eliminate sharp tools from the equation entirely.
The decor game has shifted. Fall decorating in 2026 leans heavily into curated, aesthetic displays. Think cohesive color palettes on a porch, matching pumpkin sets on a mantel, or statement pumpkins that work with your interior design — not just a single grinning face on the front step. Painted pumpkins give you that level of control.
Before You Paint: Materials That Actually Matter
This is where most “pumpkin painting ideas” articles fail you. They show you a gorgeous painted pumpkin and say “paint it like this!” without telling you what paint to use, whether to prime, or how to keep it from peeling off in the rain.
Let’s fix that.
Choosing Your Pumpkin Surface
You have two main options, and the choice affects everything else:
Real pumpkins — the classic. They’re organic, imperfect, and have a natural waxy skin that paint doesn’t love to stick to. You’ll need to prep the surface (more on that in a moment). They’re also temporary; even unpainted, a real pumpkin lasts 8–12 weeks if uncut and kept cool.
Faux/craft pumpkins — foam pumpkins from craft stores (Michaels, Hobby Lobby, Dollar Tree) or higher-end resin/ceramic pumpkins. Paint adheres beautifully. They last forever. They’re ideal for anyone who wants to build a reusable fall collection. The downside: cheap foam pumpkins can look obviously fake unless you put some effort into the finish.
The Paint Comparison: What Works and What Doesn’t
| Paint Type | Best For | Adhesion on Real Pumpkin | Adhesion on Faux | Finish | Outdoor Durability | Price Point |
|---|---|---|---|---|---|---|
| Acrylic craft paint | All-purpose, most designs | Good (with prep) | Excellent | Matte to satin | Moderate (seal it) | Low ($1–3/bottle) |
| Chalk paint | Matte/vintage/farmhouse look | Very good | Very good | Ultra matte | Low (must seal) | Medium ($8–15) |
| Spray paint | Solid color bases, metallics | Good (with primer) | Excellent | Varies | Good | Medium ($5–10/can) |
| Acrylic paint pens / Posca markers | Detail work, lettering, line art | Good | Excellent | Satin | Moderate (seal it) | Medium ($15–25/set) |
| Latex house paint | Large batch painting, solid coverage | Excellent | Good | Satin/semi-gloss | Very good | Low (use leftovers) |
| Tempera / washable paint | Kids’ projects (cleans up easily) | Poor (smears) | Poor | Matte, streaky | None | Very low |
The verdict for most people: Acrylic craft paint (brands like Apple Barrel, FolkArt, or DecoArt) is the workhorse. It’s cheap, widely available, comes in every color, and works on both real and faux pumpkins. For detail work on top of a base coat, Posca markers or fine-tip acrylic pens are a game-changer.
Prepping a Real Pumpkin for Paint
Skip this step and your paint will bead up, peel off, or go patchy.
- Wipe down the pumpkin with a damp cloth to remove dirt. Let it dry completely.
- Remove the waxy coating by lightly wiping with rubbing alcohol or a mix of equal parts white vinegar and water. This is the critical step most people skip.
- Optional primer: For spray paint projects or when you need an ultra-smooth base, a light coat of white spray primer (Rust-Oleum or Krylon) gives paint something to grip. For acrylic craft paint, the vinegar wipe is usually enough.
- Let it dry. Seriously. Painting a damp pumpkin is the fastest way to get streaky, peeling results.
Sealing Your Work
If your painted pumpkin is going outdoors or you want it to last more than a couple weeks:
- Matte or satin clear acrylic sealer (spray-on, like Krylon or Mod Podge clear acrylic sealer) — the easiest option. Two light coats. Wait 30 minutes between coats.
- Brush-on Mod Podge — works but can leave visible brush strokes. Better for a decoupage or vintage look.
- Polyurethane spray — the most durable option for outdoor display. Slightly more expensive but worth it for porch pumpkins.
Do not use hairspray as a sealant. This myth circulates every fall, and it doesn’t work. It’s sticky, not waterproof, and attracts dust.
Pumpkin Painting Ideas by Skill Level
Easy / Beginner (No Art Skills Required)
These are the “I can’t even draw a straight line” designs. They work because they rely on techniques, not talent.
1. Solid Dip-Dye Pumpkin Paint the bottom third of the pumpkin in one bold color (black, navy, emerald, burnt orange) and leave the top natural. Looks intentional and modern with zero skill required. Use painter’s tape for a clean line.
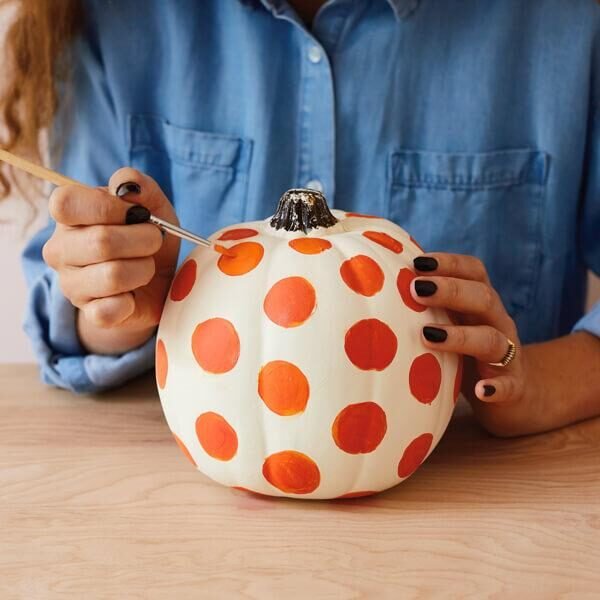
2. Polka Dot Pumpkins Dip the eraser end of a pencil into acrylic paint and stamp dots in rows or random clusters. Gold dots on a white pumpkin is a perennial crowd-pleaser. Metallic dots on matte black is sleek.
3. Splatter Paint Pumpkin Paint the base white or cream. Thin your acrylic paint slightly with water, load a stiff brush, and flick it at the pumpkin. Jackson Pollock energy, no drawing required. Great for groups and kids because there’s literally no wrong way to do it.
4. Rubber Band Stripe Pumpkin Wrap thick rubber bands vertically around the pumpkin. Spray paint or brush paint over the whole thing. Remove the bands once dry to reveal clean, organic stripes. The pumpkin’s natural ridges make this look surprisingly elegant.
5. Sticker Resist Pumpkin Place star, letter, or shape stickers on a natural or white pumpkin. Paint over the entire surface. Peel stickers once dry. You get crisp shapes without any freehand work.
6. Glitter Dipped Pumpkin Apply Mod Podge to the bottom half. Roll in fine glitter. Shake off excess. Done. Pair with a solid matte top half for contrast.
7. Washi Tape Geometric Pumpkin No paint needed at all. Wrap washi tape in geometric patterns around a white faux pumpkin. Swap tape colors and patterns for different looks. Takes about 10 minutes.
8. Ombré Pumpkin Choose three shades of the same color (light, medium, dark). Start with the lightest at the top, blend into medium in the middle, darkest at the base. Use a damp sponge to blend where the colors meet. Ombré is extremely forgiving because imperfect blending still looks intentional.
Intermediate (Some Patience Required)
9. Botanical / Leaf Print Pumpkin Paint the pumpkin a solid base color (white, sage, terracotta). Press real leaves or ferns into acrylic paint and stamp them onto the surface. The natural vein patterns create detail you couldn’t draw by hand. Layer different leaf shapes for depth.
10. Terrazzo Pattern Pumpkin A white or cream base with irregular geometric flecks in terracotta, sage, mustard, and blush. Use a small flat brush to paint random confetti-like shapes. Terrazzo is trending hard in home decor and translates beautifully to pumpkins.
11. Constellation / Night Sky Pumpkin Black or deep navy base. Use a fine paint pen or thin brush to dot white and gold stars. Connect some into constellations with thin lines. A gold crescent moon on one side adds drama. This is a standout on a dark porch.
12. Face Silhouette Pumpkin Paint the pumpkin black. Print a simple face silhouette (a witch, a cat, a haunted house) on paper, cut it out, trace it onto the pumpkin with a white colored pencil, then fill in the silhouette with white or metallic paint. The high contrast does the heavy lifting.
13. Marbled Pumpkin This uses a water-dipping technique. Fill a bucket with lukewarm water. Drizzle nail polish or acrylic paint (thinned with a few drops of dish soap) on the water’s surface. Swirl gently with a toothpick. Dip the pumpkin in and slowly rotate. Pull out and let dry. Results are unpredictable in the best way.
14. Typography / Lettering Pumpkin Use paint pens or Posca markers to write words: “BOO,” “GATHER,” “THANKFUL,” “hello pumpkin,” a family name, or a favorite quote. Print your text in the font you like, cut it out, trace it lightly in pencil, then go over it in paint. Vinyl letter stickers also work if your handwriting isn’t cooperating.
15. Color Block Pumpkin Section the pumpkin into 3–4 geometric zones using painter’s tape. Paint each zone a different bold color. Remove tape for sharp lines. Think Mondrian meets October.
16. Chinoiserie Pumpkin A blue-and-white pumpkin painted to look like classic Chinese porcelain. White base, blue floral or botanical motifs. This one requires a steady hand or a very fine paint pen, but the results are genuinely stunning and look expensive.
17. Plaid / Buffalo Check Pumpkin Use painter’s tape to create a grid. Paint alternating squares. Layer a second color at the intersections for authentic plaid depth. Time-consuming but the result reads as very polished.
Advanced / Ambitious (Art Project Territory)
18. Realistic Floral Pumpkin Paint a dark base (black, deep green, burgundy). Freehand roses, peonies, dahlias, or wildflowers across one side or cascading from the stem. This is the “Pinterest famous” look. It takes time but photographs incredibly well. Use a reference photo and sketch lightly in pencil first.
19. Sugar Skull / Día de los Muertos Pumpkin A white base with intricate floral and geometric patterns in bright colors — marigold orange, hot pink, turquoise, lime green. This style celebrates the Mexican holiday and has become a popular cross-cultural painted pumpkin tradition. If you’re unfamiliar with the symbolism, research the tradition respectfully before creating one.
20. Trompe l’Oeil / Faux Texture Pumpkin Paint a pumpkin to look like something it isn’t — marble, wood grain, concrete, copper patina, or woven basket. The marble effect (grey and white with gold veining) is particularly popular for minimalist fall decor. A sea sponge and a feather for veining are your main tools.
21. Pop Art Pumpkin Bold outlines, Ben-Day dots, primary colors. Think Roy Lichtenstein or Andy Warhol. Paint a comic-style explosion, a hamburger, or a Warhol-style repeated pumpkin grid on a pumpkin. It’s absurd and eye-catching.
22. Portrait Pumpkin Paint a face — your pet, a classic horror character, a famous painting recreation. This is true freehand art territory. Use acrylic paint and thin brushes. Grid your reference photo and lightly grid the pumpkin to maintain proportions.
23. Glow-in-the-Dark Scene Pumpkin Paint a daytime scene (a house, a graveyard, a forest) with regular acrylic. Go over key elements (ghosts, eyes, the moon, window glow) with glow-in-the-dark acrylic paint. By day it looks like a normal painted pumpkin. At night, the hidden elements emerge.
Pumpkin Painting Ideas by Audience
For Kids (Ages 2–5): Sensory-Friendly, Mess-Managed
Toddler pumpkin painting is really about the process, not the product. Keep expectations loose and focus on fun.
- Finger paint pumpkins — use washable tempera or finger paint. Accept the abstract result. Put the pumpkin on a tray or old baking sheet to contain the mess.
- Sticker pumpkins — googly eyes, foam stickers, glitter stickers. No paint needed. Kids this age love sticking and peeling.
- Sponge stamp pumpkins — cut kitchen sponges into shapes (stars, hearts, triangles). Dip in paint, stamp on pumpkin. More control than brushes for small hands.
- “Monster” pumpkins — paint the whole thing one color (green, purple, orange). Add googly eyes, pipe cleaner arms, and pom-pom noses with hot glue (adult handles the glue gun).
- Dot marker pumpkins — bingo daubers / Do-A-Dot markers are perfect toddler tools. Chunky, no-spill, and they create satisfying polka dot patterns.
For Kids (Ages 6–12): Guided Creativity
This age group can handle more detail and genuinely enjoys seeing a finished product they’re proud of.
- Emoji pumpkins — paint a yellow base and recreate favorite emojis. Simple shapes, instant recognition, guaranteed giggles.
- Galaxy pumpkins — sponge on layers of dark blue, purple, and black. Splatter white for stars. Surprisingly easy and looks amazing. Kids love the sponge-and-splatter technique.
- Animal face pumpkins — owls, cats, foxes, and pandas translate well to pumpkin shapes. Draw the outline in pencil, then paint. The pumpkin’s natural round shape helps.
- Sports team pumpkins — paint in team colors and add a logo or jersey number.
- Mummy pumpkins — paint the pumpkin white. Wrap in strips of gauze or white fabric. Add googly eyes peeking through. Part painting, part crafting.
For Adults: Date Night & Wine Night Designs
- Moody florals on dark backgrounds
- Minimalist line art — single continuous-line faces or botanicals in black on white
- Metallic everything — gold, copper, or rose gold pumpkins as table centerpieces
- Matching pumpkin sets — paint 3–5 pumpkins in a coordinated palette for a cohesive porch display
- Abstract art pumpkins — bold brushstrokes, drips, and texture play. Channel your inner abstract expressionist with no pressure to “make it look like something”
For Groups & Parties: Pumpkin Painting Party Ideas
Hosting a pumpkin painting party (popular for fall birthdays, classroom events, team-building, and friendsgiving gatherings):
- Set up a supply station with acrylic paints, brushes, paint pens, sponges, stencils, and embellishments (rhinestones, washi tape, ribbon).
- Provide inspiration cards — print 10–15 design ideas on cards so guests aren’t staring at a blank pumpkin.
- Use faux pumpkins for parties so there’s no time pressure (real pumpkins need to dry carefully). Dollar Tree foam pumpkins keep costs under $2 per guest.
- Assign a theme if you want cohesion: everyone paints a different emotion, a different animal, or picks from a shared color palette.
- Cover surfaces. Cheap plastic tablecloths or butcher paper are essential. Acrylic paint does not come out of most fabrics.
2026 Trending Styles
Fall 2026 pumpkin painting trends are leaning in a few clear directions:
Quiet luxury / neutral palettes. Muted tones — warm whites, taupes, sage greens, dusty mauves, and terracotta — in matte finishes. The “Instagrammable porch” look is less about Halloween shock value and more about cohesive seasonal decor that works from September through November.
Mushroom and woodland motifs. Cottagecore isn’t going anywhere. Painted toadstools, ferns, acorns, and woodland creatures on pumpkins are everywhere this year.
Maximalist faces and characters. On the opposite end, bold painted faces — exaggerated expressions, cartoon characters, vintage horror — are popular for people who want personality over polish.
Mixed media. Combining paint with other materials: dried flowers hot-glued to a painted base, fabric wrapped around the middle, beaded “necklaces” around the stem, or decoupage with vintage book pages.
Textured finishes. Using baking soda mixed into paint for a stone or concrete texture, or layering with a palette knife for thick, impasto-style brushstrokes.
Myth vs. Fact: Painted Pumpkin Edition
Myth: You need special “pumpkin paint.” Fact: Regular acrylic craft paint works perfectly. There is no such thing as paint specifically formulated for pumpkins, despite what some seasonal marketing suggests. Any acrylic paint adheres well to prepped pumpkin skin.
Myth: Painted pumpkins last just as long as unpainted ones. Fact: They can actually last longer. The paint and sealant create an extra barrier against moisture and bacteria, slowing decomposition. A sealed, painted real pumpkin kept in cool, dry conditions can last 2–3 months.
Myth: Spray paint will melt foam pumpkins. Fact: This used to be true with older solvent-based spray paints. Most modern spray paints (Rust-Oleum 2X, Krylon Fusion) are acrylic-based and safe for foam. Always check the label — if it says “works on plastic/foam,” you’re fine. When in doubt, test on the bottom first.
Myth: You can paint a pumpkin and then carve it. Fact: You technically can, but the paint chips and peels at the cut edges, and the carved area will rot much faster than the painted area. If you want both, carve first, then paint. Even then, you’re shortening the lifespan significantly.
Myth: Hairspray seals painted pumpkins. Fact: Hairspray is not a sealant. It leaves a sticky, non-waterproof film that attracts dust and insects. Use a clear acrylic sealer or polyurethane spray.
Pro Tips: Lessons From Years of Painted Pumpkins
After years of painting pumpkins for seasonal displays, client events, and way too many “pumpkin painting party” setups, here are the mistakes we see over and over — and how to avoid them:
Don’t skip the base coat. Even if you’re painting a detailed design, a solid base coat of white or your lightest color gives every subsequent layer something to pop against. Painting directly onto orange pumpkin skin muddies your colors.
Work in thin layers. Two thin coats always look better than one thick coat. Thick acrylic paint on a curved surface cracks when it dries, especially outdoors where temperatures fluctuate.
Paint from the back. Start your design on the back side of the pumpkin. By the time you work around to the front, you’ve practiced the technique and worked out any issues. Your best work ends up where people actually see it.
Invest in decent brushes. The $1 craft store variety packs shed bristles and leave streaks. A few mid-range synthetic brushes ($5–10 for a set of detail rounds and flats) make a noticeable difference, especially for fine details and smooth coverage.
Let the stem be the star. A plain pumpkin with a beautifully painted or gilded stem (gold, copper, or matte black) looks more polished than a busy design. Sometimes the best “idea” is restraint.
Photograph in natural light. If you’re planning to share your work, painted pumpkins photograph best in soft natural light (golden hour is ideal). Indoor lighting washes out the colors and creates harsh shadows in the ridges.
FAQ
What kind of paint do you use on pumpkins?
Acrylic craft paint is the most versatile and widely recommended option for painting pumpkins. It adheres well to both real and faux pumpkins, dries quickly, comes in every color imaginable, and is easy to clean up with water before it dries. For outdoor display, seal with a clear acrylic spray to protect against moisture.
How do you get paint to stick to a real pumpkin?
Clean the pumpkin thoroughly and wipe the surface with rubbing alcohol or a white vinegar-water mix to remove the natural waxy coating. Let it dry completely before painting. This simple prep step makes a dramatic difference in how well the paint adheres and prevents peeling and beading.
How long do painted pumpkins last?
An uncarved, painted real pumpkin typically lasts 8–12 weeks when kept in cool, dry conditions and properly sealed. Faux painted pumpkins last indefinitely and can be stored and reused year after year. Avoid placing real painted pumpkins in direct sunlight or wet conditions, which accelerates decay.
Can toddlers paint pumpkins safely?
Yes, pumpkin painting is one of the safest fall activities for toddlers. Use washable tempera paint or finger paint, which is non-toxic and cleans up easily. Avoid small embellishments that could be choking hazards. Supervise the activity and set up on a protected surface, since toddlers will absolutely get paint everywhere.
Is it better to paint real or fake pumpkins?
It depends on your goal. Real pumpkins offer an organic, textured surface and are perfect for seasonal one-time displays. Faux pumpkins accept paint more easily, allow for more precise detail work, and can be reused for years, making them more cost-effective long-term. Many people use a mix of both.
Do you need to prime a pumpkin before painting?
For most acrylic paint projects, wiping the pumpkin with rubbing alcohol is sufficient preparation and a dedicated primer isn’t necessary. However, if you’re using spray paint or want an ultra-smooth, opaque base for detailed work, a coat of white spray primer improves coverage and adhesion significantly.
What’s Next
Pumpkin painting has moved well past the “kids’ activity at a fall festival” category. It’s a legitimate seasonal craft with a real design community, evolving trends, and techniques that range from five-minute projects to multi-hour art pieces. The best part hasn’t changed, though: there’s no wrong way to do it. A pumpkin with one giant googly eye glued to it brings just as much joy as a hand-painted floral masterpiece.
Pick up a pumpkin — real or faux — grab some acrylic paint, and start with whatever idea grabbed your attention in this guide. If you’re shopping for supplies, we recommend starting with a basic acrylic paint set, a pack of Posca markers for detail work, and a can of clear acrylic sealer. That kit covers about 90% of the designs above.
Looking for more fall craft inspiration? Check out our guides to fall wreath ideas, Halloween porch decor, and DIY Thanksgiving centerpieces to round out your seasonal decorating.